I love HGTV…I hardly watch anything else anymore. Right now my top favorite shows are Home Town and Unsellable Houses. I don’t know if it’s because I’m from the northwest too, but I can’t get enough of Lyndsay and Leslie (the twins) on Unsellable Houses, from their humor to their gorgeous style.
They do an incredible job staging the houses they sell, and on one particular episode, they draped a wooden garland elegantly on a fireplace mantle. I don’t have a fireplace, but inspired me to make my own and it works great on my TV stand (my TV becomes a digital fireplace with the Yule Log at Christmas anyway)!
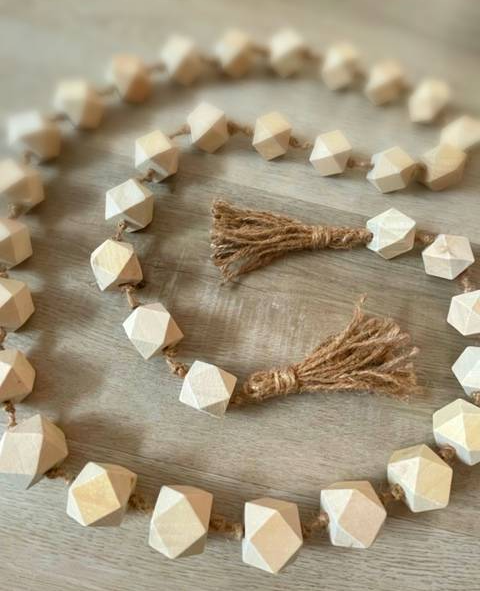
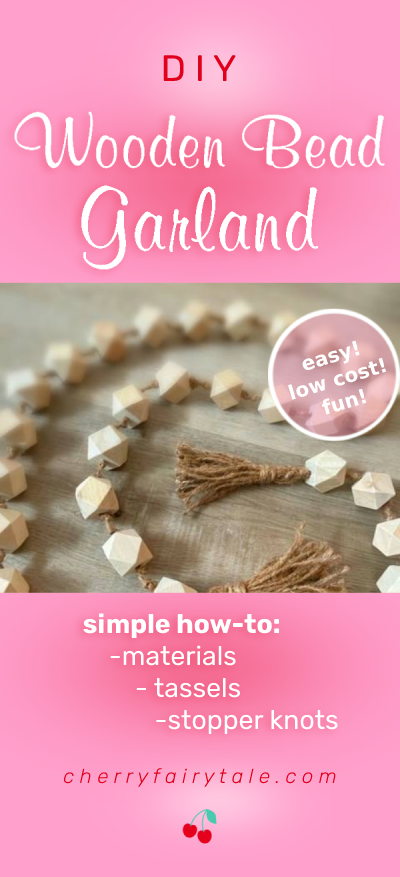
Their garland had white ‘marshmallow’-shaped beads, but I wanted mine to have a more ‘geo’ (geometric) shape, so I went with geometric beads (from Hobby Lobby). I also liked the natural look of the wood so I didn’t paint them, but you certainly can if you prefer! I even think it would look neat to paint some beads white and leave some natural.
I love knots. I love tying them and untying them. People sometimes give me their knotted necklaces to fix because I never met a knot I couldn’t undo…and in pretty good time, too. There are knot-untying competitions I could probably enter, but anyway…for the garland, I made my own tassels (with a hidden knot), and made stopper knots between the beads with the ‘Ashley’ stopper knot.
The best tip I can give is it took more beads than I expected…my garland has 36 beads (4 packs of 25mm with 9 beads per pack). Even with the knots creating space between, it takes quite a few to make a 6′ long garland. But I bought them on sale from Hobby Lobby* so it was only $1.49 per pack.
Materials
Large (25mm or so) Wood Beads (approx. 36 beads)
Jute Cord (I bought at Dollar Tree)
Supplies
Fabric Scissors
Measuring Tape (or ruler)
Toothpick
Tape
Tassels
I wrapped the cord around my 4 fingers about 22 times (remember how many times so you can repeat the same size for the other end). Cut a piece and tie the loops with it to secure together. Now take the spool of cord (without cutting) to wrap around the top of the tassel, but first make a loop. Then wrap tightly around that loop and all the loops about an inch from the top (I wrapped mine 7 times). Cut and thread that working end back through the loop you created, then pull the loop up into the inside of the tassel by pulling its other end. Cut off the piece coming out of the top of the tassel. Cut the loops on the bottom open into blunt ends, then trim all the ends in one snip to your desired length. Repeat to make one more tassel.

Stopper Knots
You could skip this part and just string the beads on, but the knotting gives it a more refined, upscale look, and it’s pretty easy to do! Decide how long you want your finished garland to be, then cut a piece of cord that is double that length (to allow for enough length for the knots). Attach a tassel to the end (hide the ends inside the tassel). Tape a toothpick to the working end of the cord (to make it easy to thread the beads). Create the first stopper knot by making a slip knot (if you crochet you already know how), then thread the working end back through the loop of the slip knot and pull tight to secure. Add a bead and repeat the stopper knot, keeping it as close as possible to the bead. For the next knot, leave about a 1/4″ space in between knots.
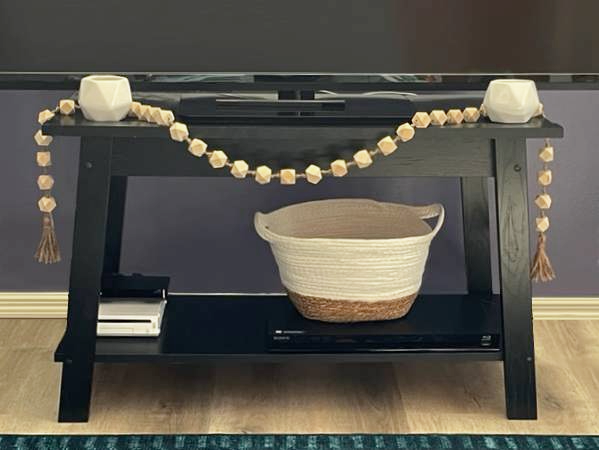
That’s pretty much it…tie on the other tassel and you’re done! I also bought 2 white hexagon pots* (from Hobby Lobby) to drape my garland around (Lyndsay & Leslie might even call that a “twin win”). I thought they were candle holders, so that could work too. They needed to be small so they wouldn’t cover up the screen, but it’s totally up to you how you want to make it your own! What’s your style like? Let me know with a comment!
*I am not paid to promote anything whatsoever mentioned in this post…I just love what I love!