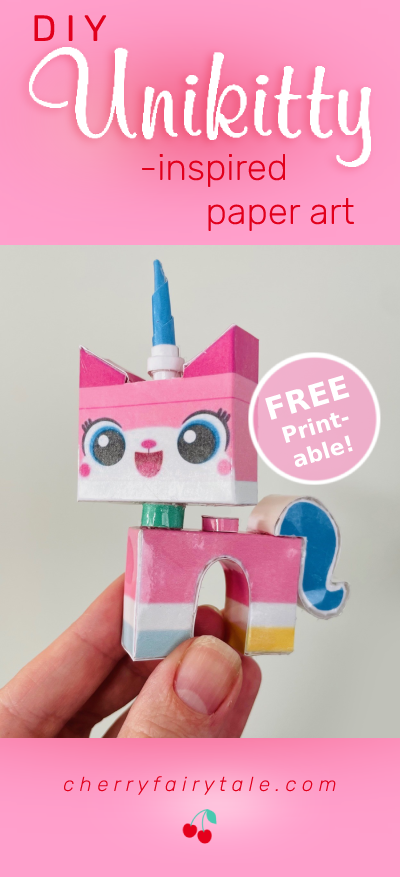
It’s hard to believe The Lego Movie is almost 10 years old, but my 5-year-old just discovered it and now loves Unikitty, the cute, pink little unicorn-cat. I love her too. She’s voiced by Alison Brie who I know as Annie from Community, one of my all-time favorite TV shows. So I was happy to make my daughter a paper toy inspired by Unikitty.
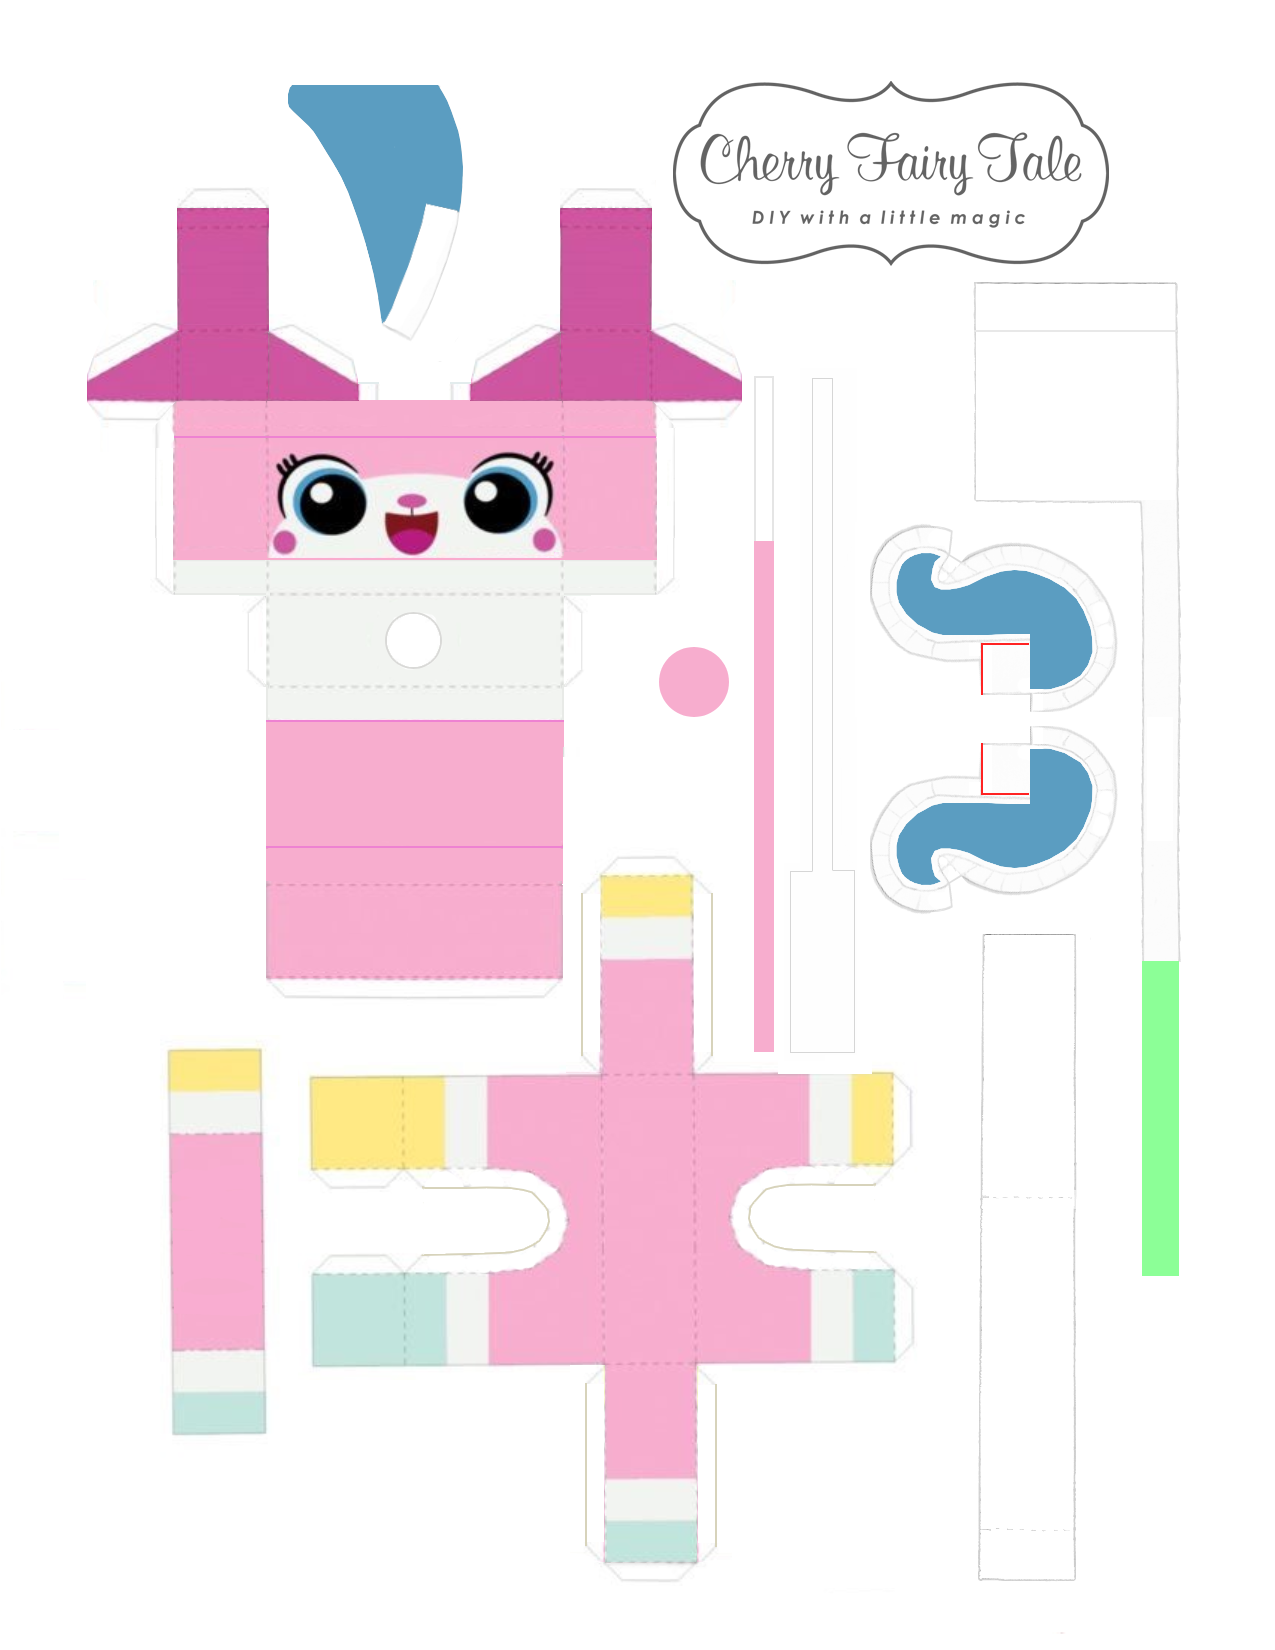
I thought I could find a printable, and I did find one on Pinterest that seems to be originally from someone on Deviant Art but is no longer there. Most of the pattern didn’t make much sense and had a lot of intricate shapes too small to cut out. I simplified the pattern by reducing the number of pieces and by using the quilling technique. If you’re not familiar with quilling, it’s pretty much just rolling strips of paper. It worked out great for the round pieces so that they are truly round (instead of geometric).
Here’s the pattern to print!
Materials
Cardstock – 1 sheet
Lamination Sheet – 1
Hot Glue Sticks
Supplies
Color Printer
Scissors
Cutting Mat & Xacto Knife
Hot Glue Gun
Bone Folder & Ruler (for scoring)
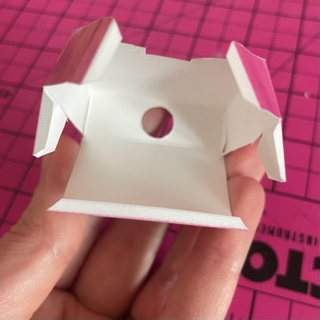
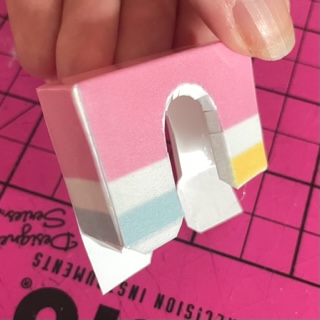
Step 1: After printing on cardstock and laminating, score all folded edges. Cut out all pieces with scissors and use the Xacto knife to cut out the circular hole in the head. Fold all the scored lines. Now for the glue! I began with the head by gluing the front to the sides.
Step 2: Glue the back of the head to the sides, then the top to the front. Glue the ears together and on top of the head.
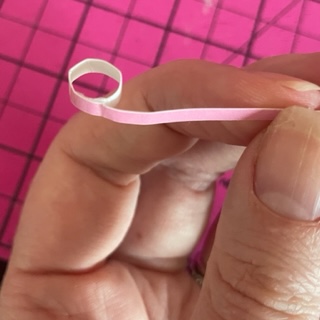
Step 3: Curl the neck starting at the white end (you can use a something like a pen or chopstick) and glue it at the marked line into a tube. Continue gluing the rest of the strip tightly around.
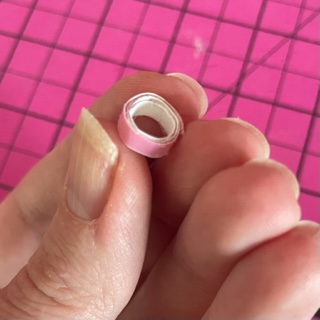
Step 4: Curl and glue the neck base the same way as step 3.
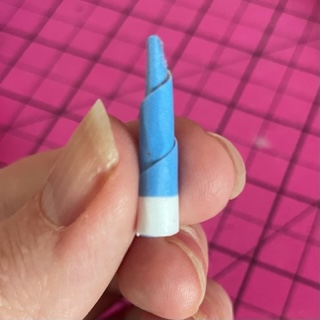
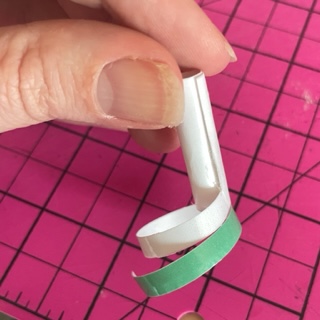
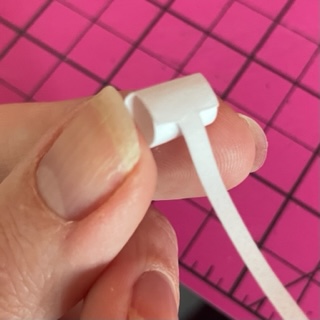
Step 5: Also curl and glue the horn, starting at the all blue long edge.
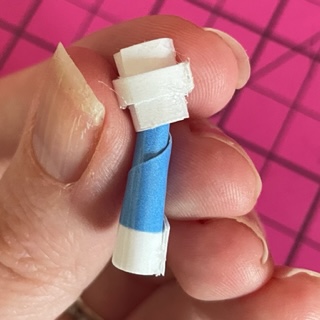
Step 6: Attach the horn to the horn base by inserting the horn point first through the base until the white edges align, then secure it with glue on the inside from the bottom opening.
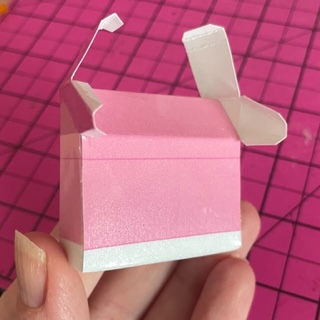
Step 7: Glue the legs together at the front and back.

Step 8: Glue the bottom hooves then glue the middle piece (the 2 curved edges must be snipped every 1/8″ or so).
Step 9: Curl the back piece starting on the white side and glue where the white meets the pink, creating a circle. Continue gluing tightly around. Glue the pink circle over the top.
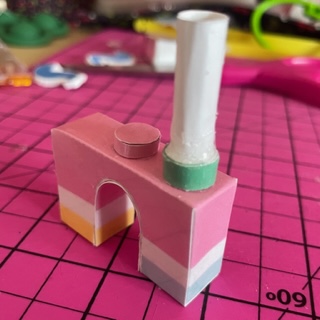
Step 10: Glue the back piece to the middle of the body and the neck piece to the front of the body (the blue hoof is the front).
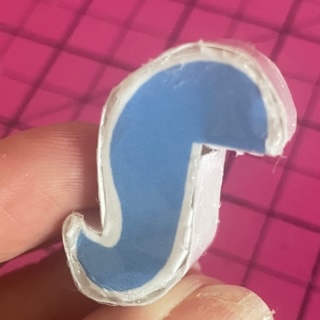
Step 11: Finally, make the tail. This was the hardest part. Score so that some white still shows around the side edges when folded, and snip all the curved edges. Score at the top of the tail (where the blue edge is straight), cut at the marked red lines, and fold the tabs under. Score the middle piece (white rectangle) in the 2 marked places and fold. Glue the 2 tabs to the short end of the middle piece, then glue the entire middle piece all the way around the side pieces, folding again at the tail tip. Then glue to the back of the body.
Place the head onto the neck and you’re all done! You can glue it to secure, or leave it loose to be able to turn. I’m going to go ahead and say I’m a Master Builder, at least when it comes to Unikitty. What about you? Let me know with a comment and remember, everything is awesome! 🙂