***If you are new to crochet, start with this post.***
Making your own Santa (or elf) hat is EASY and FUN!
Here is my FREE video tutorial showing step by step (written pattern below)
As a crochet newbie, I was intimidated at first by the special stitches on the hat brim, but trust me, if you can crochet, you can do those stitches too: FPDC (Front Post Double Crochet) & BPDC (Back Post Double Crochet). Might sound complicated, but it’s not.
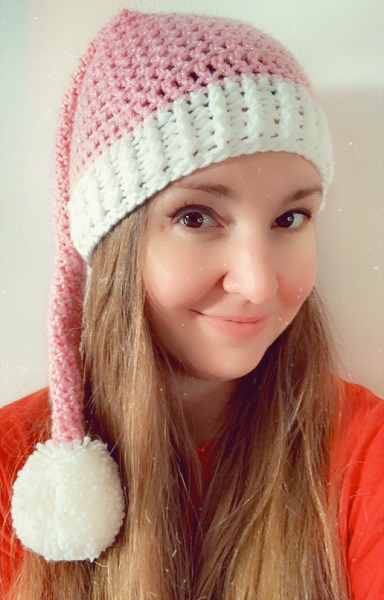

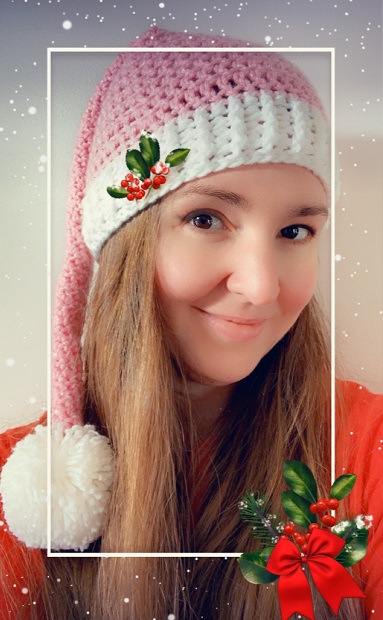
You can make it whatever size you like…child, adult, or gigantic brainy size (like mine). Go classic red & white, or any colors you want. I used I Love This Yarn in Pinky Toes Sparkle from Hobby Lobby. It’s delightfully girly and my favorite…SPARKLY!
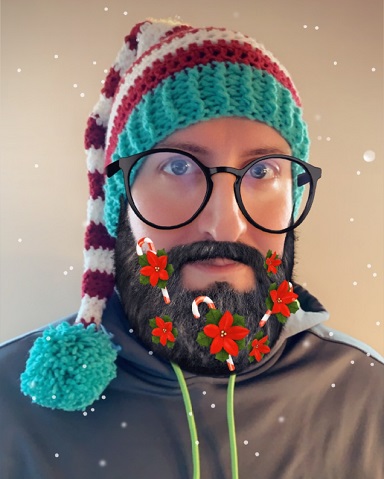
Who doesn’t love a cute Santa hat? Even my husband, who isn’t known for his Christmas spirit, asked me to make him one. For his I did red & white stripes to look like a candy cane, with the brim and pom pom in a cute teal color.
For a long, skinny hat, add one or more rows of just DC (between increasing rows). I did 2 rows of just DC between increasing rows. It may take a few tries to figure out what you like…it took me 3 tries, so you may need to take it out and start over, but you’ll be happier in the end that it looks how you want. You can size it by putting it on your head as you go.
For a more triangular (wider) hat shape, leave out the rows of just DC between increasing rows until you reach the head width (then you can just DC as needed).
For stripes, follow the same pattern, but change the yarn color every 2 rows.
Materials/Supplies
Yarn (whichever colors you like)
Crochet Hook (in the size that goes with your yarn)
Scissors
Cardboard circles (to make pom pom)
Yarn needle (to weave in ends)
KEY
DC = Double Crochet
SL ST = Slip Stitch
CH = Chain
STS = Stitches
SC = Single Crochet
FPDC = Front Post Double Crochet
BPDC = Back Post Double Crochet
FO = Fasten Off
Tail
Begin making the hat with the tail.
Row 1: Magic ring, DC 6 into magic ring, SL ST to join (=6 STS)
Rows 2-4: CH 2, DC 6, SL ST to join (=6 STS)
Row 5: CH 2, 2 DC (that means into ONE stitch), DC, repeat this around, SL ST to join (=9 STS)
Row 6 & 7: CH 2, DC around, SL ST to join (=2 rows of 9 STS each)
Row 8: CH 2, 2 DC, DC 2, repeat around, SL ST to join (=12 STS)
Row 9 & 10: CH 2, DC around, SL ST to join (=2 rows of 12 STS each)
Row 11: CH 2, 2 DC, DC 3, repeat around, SL ST to join (=15 STS)
Rows 12 & 13: CH 2, DC around, SL ST to join (=2 rows of 15 STS each)
Continue this increasing pattern until you reach the widest part of the head…keep going with DC 4, DC 5, DC 6, etc. with 2 (or more) rows of DC in between; I went up to DC 18 with mine and then it was onto the brim.
Brim
Switch yarn color (I did white)
SC around, SL ST to join, CH 2
FPDC then BPDC and repeat around. Repeat 3 more times for a total of 4 rows.
FO and weave in ends
Pom Pom
I used white yarn and wrapped it around my hand 180 times. Depending on the yarn weight, you may need to do less or more. Pull it off your hand and tie it around the middle as tightly as possible with a knot. Cut all the loops. Sandwich the pom pom between 2 cardboard circles, holding the knot tails away (you can also cut a hole in the center of the cardboard and pull the tails through, or loop the tails inside so they don’t get cut). Trim all around the circle edges; shake out and turn the pom the other direction, sandwich, and trim again. Knot the tails to the hat tail; pull tails to the inside with the crochet hook.
I hope you enjoy this FREE pattern! I’m happy to share it since I was able to make it by studying other free patterns out there. The hat makes a great gift or is just fun to wear to a Christmas party. How did you adjust this pattern, or did it work as is for you? LMK with a comment 🙂
