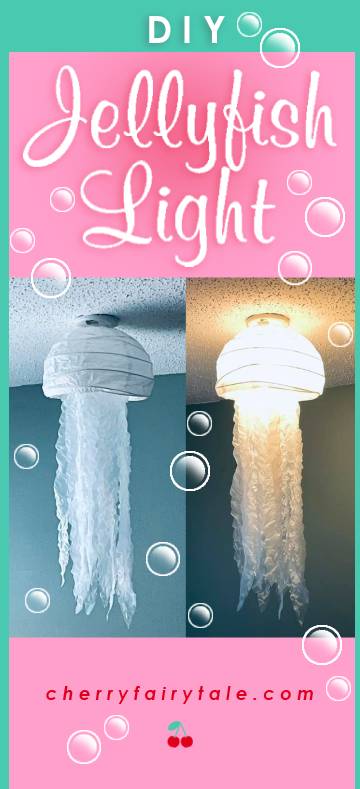
This DIY jellyfish is easy, fun, fast, and inexpensive to make…and it looks SO good! It makes a great ceiling light or just a hanging decoration. The tentacles are made of…get this…GROCERY BAGS! I’m a bit of an environmentalist so I always save my grocery bags and I love finding new ways to up-cycle them (other than garbage and dog poo, hah). So that much is essentially free, and paper lanterns only cost a few dollars (like $4 for a 3-pack of various sizes).
Materials
Paper Lantern (white, 16″ or whichever size you like)
Grocery Bags (white, about 4)
String (white)
Supplies
Scissors
Hole Punch
Hot Glue Gun + Hot Glue Sticks
STEP 1 – Tentacles
Lay out a grocery bag flat and cut off the bottom, the front (the part with the print) and the handles, leaving one long rectangle.
Cut the remaining piece (the longest way) into 1.5″ strips. One bag should make 5 or 6 strips.
Now stretch! Pull the strip diagonally to stretch it and continue down the entire strip. You can alternate the directions for an extra curly look (I did mine all in the same direction). If the plastic is thin, it may be easy to accidentally tear, but it’s probably not a big deal as you likely have plenty more bags.
Trim one end of the strip into a point.
Repeat the steps to make all the tentacles…I made 16 tentacles.
STEP 2 – ‘Bell’ (Top / Lantern)
Many make a BIG design mistake on this part: they cut off the bottom of the lantern and glue the tentacles right to the edge. It doesn’t look quite right because it doesn’t make the true jellyfish silhouette where the tentacles hang from the middle, giving the top more of a pretty bell shape…and that’s what the top is called, a bell!
Using the hole punch, punch 2 holes (across from each other) close to the edge of the top opening of the lantern. Do the same thing at the bottom opening, lining up with the top holes.
You can discard the wire frame because you won’t need it! Cut 2 long pieces of string (about 20″) and thread them through the top holes. Knot them at each hole, leaving enough of a tail to hang up later.
Thread each string to the corresponding hole on the bottom, stopping where it pulls up the lower third of the lantern, and knot at each hole. Trim off the excess length of string.
STEP 3 – Put it together!
Glue the straight top edge of each plastic strip to the bottom circle opening. I started with 4 evenly spaced, then filled in 4 more between, then the last 8 overlapping. But you can do more or fewer, and also play with various lengths.
You can hang it by tying the top strings together in a knot, or just taping each string to the top part above the light bulb, which is what I did.
AND THAT’S IT! Can you believe it? This was one of the simplest and quickest crafts I ever did, and it looks so cute in my son’s ocean-themed nursery. And, I think yours will go better than mine because I used an old paper lantern from IKEA that doesn’t have the evenly spaced lines across. So tell me how great yours turned out with a comment 🙂
