*Post updated with correct info on Hobby Lobby sales on 8/10/2020.
Wreaths are expensive. If you buy them, expensive. If you buy the materials to make them, expensive. If you ship them, expensive.
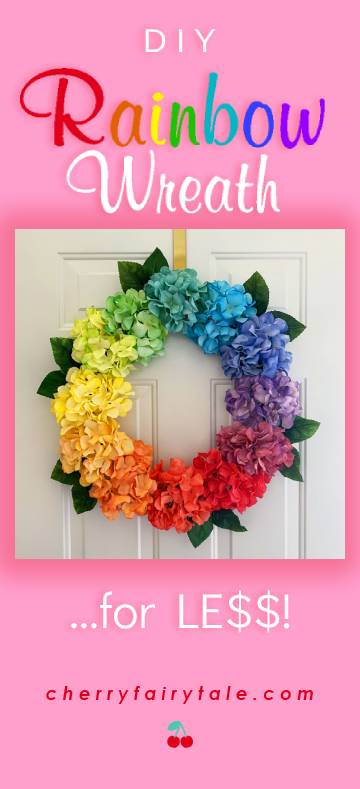
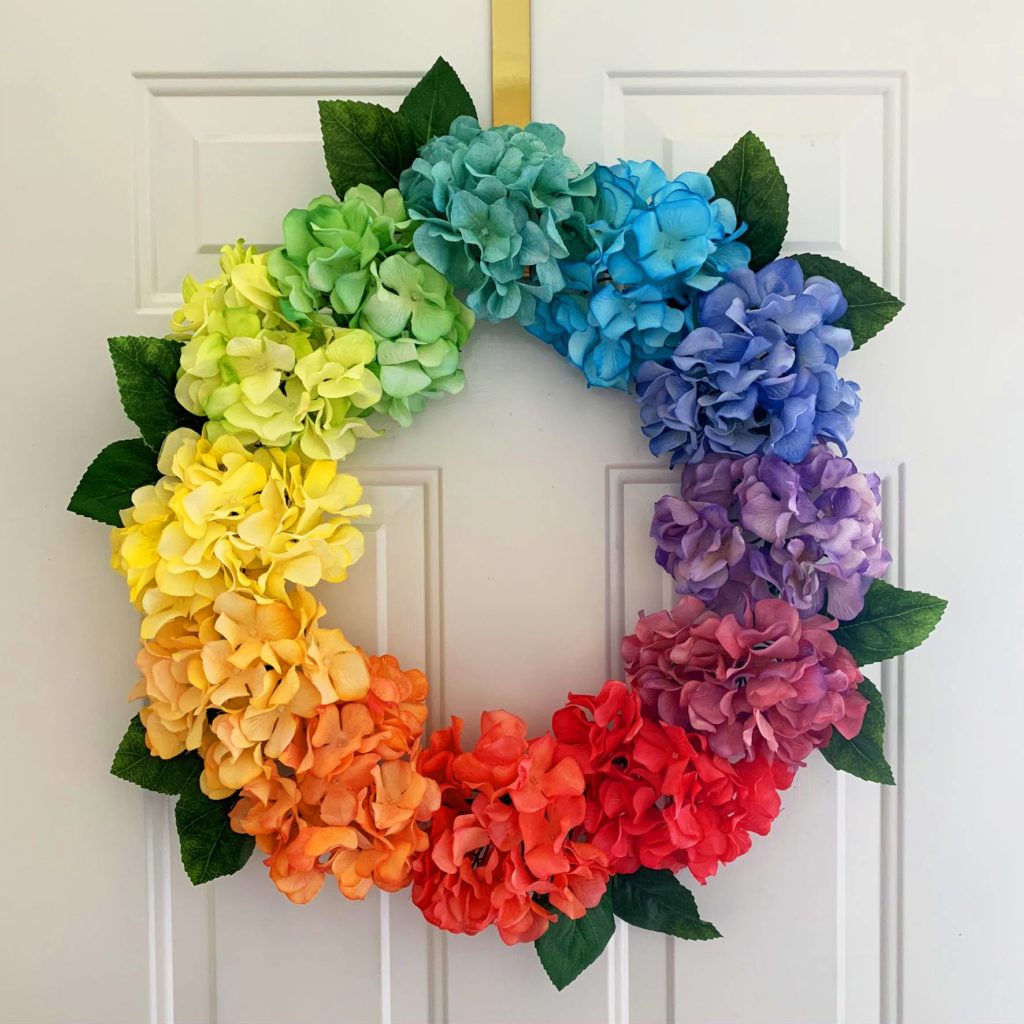
So every time Pinterest showed me a beautiful DIY wreath, I would pin it just to keep for inspiration or maybe a ‘someday’ project. And then, I saw an absolutely gorgeous wreath, the most beautiful wreath I’d ever seen: a hydrangea rainbow wreath by Kylie from thehowtomom.com. I LOVE rainbows. And I LOVE wreaths. Why had I never thought to put them together?! She is a genius.
There was only one problem: even with coupons, the materials cost about $64.
But I couldn’t get that wreath out of my head. I knew I had to figure out a less expensive way…and I did!
It takes a little more effort, but it’s truly DIY because you create the form yourself, and color the flowers yourself!
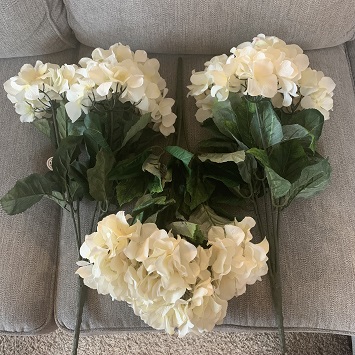
I bought my artificial hydrangeas at Hobby Lobby when floral was 50% off, which my friend tells me happens every other week. So I hit the sale when the hydrangea bushes were half off of $15.99 each and got 3 for about $24…less than half of the cost of buying individual colors!
Materials
White Artificial Flowers (3 bushes)
Acrylic Paint (at least the 3 primary colors: Red, Yellow & Blue – small container for under $1 each)
Floral Tape
Supplies
Large recyclable Plastic Container (such as a whipped topping container)
Paper Towels
Plastic Bags
Water
Hot Glue Gun/Glue Sticks
Scissors
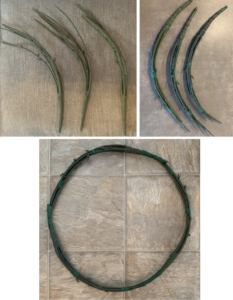
If you’ve made a wreath before, you know the first step of removing the flowers from the stems, then the stems go nowhere, except maybe the garbage. Not this time! Take 3 stems (keeping the flowers & leaves), tape any ends together with the floral tape, bend them into a curved shape, and tape them together. Voila, your wreath form (or you can just buy a form if you’re not watching a budget).
Next, use the paint as dye. I laid out plastic grocery bags flat with paper towels on top for the flowers to dry. Start with one primary color, such as yellow. Add water to a small amount of paint and mix. Dip the flowers in until they all soak up the color. Set it on the paper towel to dry.
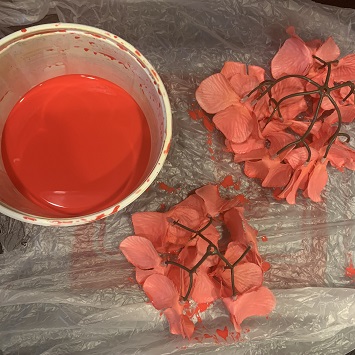
Keep using that paint and add another color, such as red. If you are making a 12-color rainbow, it will be the 6 rainbow colors (red, orange, yellow, green, blue, purple) and the 6 colors in between (red-orange, orange-yellow, yellow-green, green-blue, blue-purple, purple-red). Now you can add the next color, such as red, but only add a small amount so you can make yellow-orange first, then add more red to make orange, then red-orange.
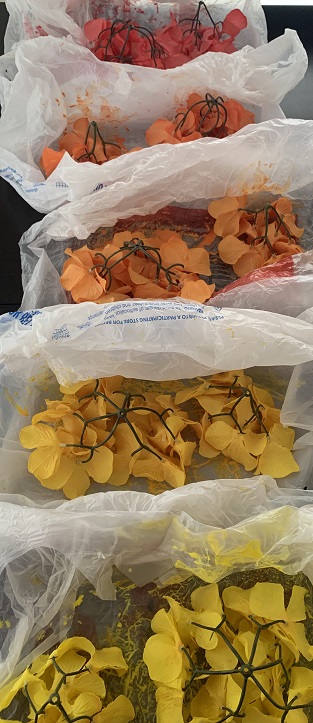
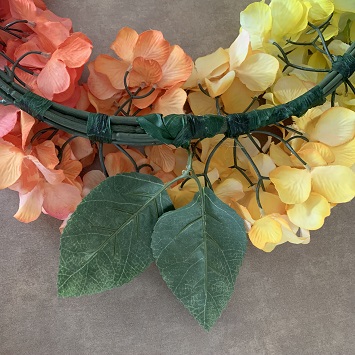
Continue this same process when you’re ready for the next primary color. Allow the flowers to dry completely (without touching) — it will take a few hours. I left them overnight just to be sure. Once dry, attach your first color with floral tape to the form and seal with hot glue.
For even spacing, it may help to lay all the flowers on top of the form to see where they will go, then continue attaching with the floral tape and hot glue.
Once all the flowers are attached, attach the leaves. They will probably be in sets of 3, so you can attach 1 leaf on the back, allowing the other 2 leaves to show. And our smart and beautiful creation is complete!
Did you use hydrangeas to make a wreath, or a different flower? One color in ombré would be so pretty too! Let me know with a comment.