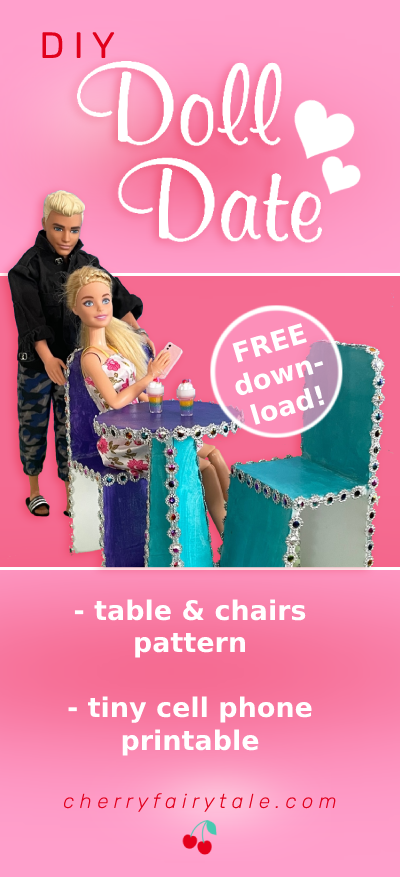
Maybe it’s because of my past life as a doll designer, but my daughter thinks she can ask me to make just about anything for her dolls and I’ll do it. She asked for a table and chairs for her Barbie dolls, so I’m sharing the instructions, patterns & printable FREEBIE extras for you here!
It’s easy and fun to involve your child in the creation process when it comes to choosing colors and painting!
Fun fact: She chose teal blue and purple, then we went to Dollar Tree to buy a Barbie tea set, which was actually teal blue and purple. I am told that type of thing is a “God wink,” and it’s my new favorite term 😉
Materials
Foam Board (white, can get at Dollar Tree)
Acrylic Paint, paintbrush
Trim – 1/4” wide (optional, can get at DT)
Supplies
Printer/Paper
Scissors
Pencil
Xacto Knife/Cutting Mat
Hot Glue Gun/Glue Sticks
First, print the free pattern, cut out and trace onto the foam board. Cut out the pieces on a cutting mat with the Xacto knife, then hot glue together.
For the table, cut 3 legs and glue them with the straight edges together evenly to the center of the table top.
For the chairs, glue the front piece to the under side of the seat first, then glue the seat to the chair back to complete.
Next, paint! We only found it necessary to paint the outer sides.
Finally, glue the trim to the edges and you’re done. You can skip this if you prefer but it covers up the rough edge and also looks fancy. I found 1/2″ trim at Dollar Tree and just cut it down the middle.
Print the tiny menus for fun play too! Laminate them for more sturdiness. Don’t forget to add the tiny tea set or food. I used a Barbie tea set (Dollar Tree), and tiny drinks from earrings (Claire’s line at Walmart). It’s also fun to make your own with polymer clay, and their are plenty of tutorials if you’re not sure how!
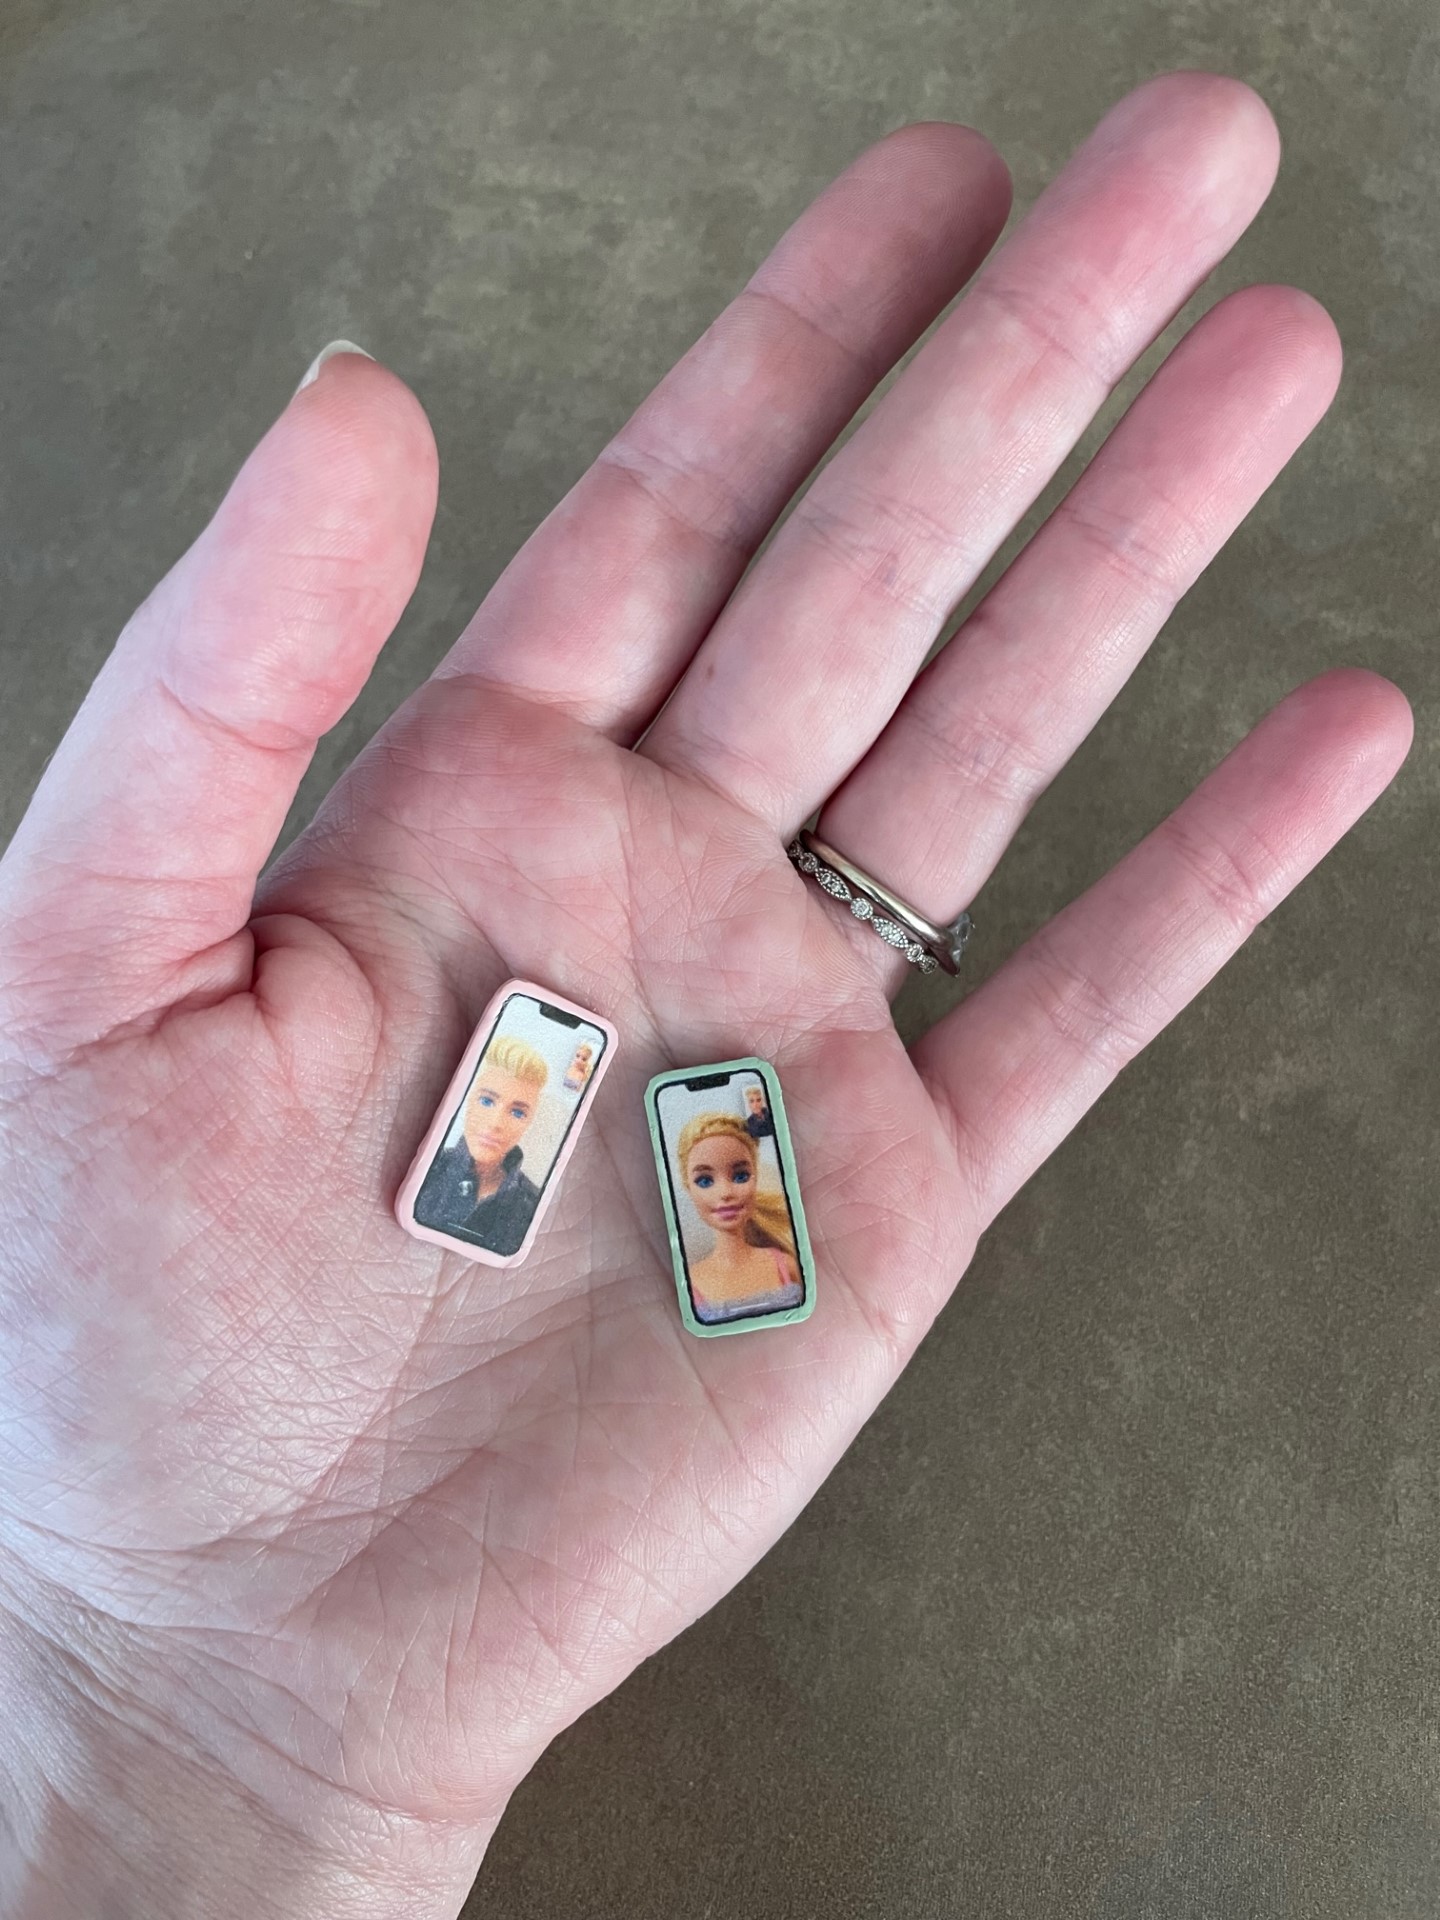
I also included little cell phone printables for extra fun if you wish! Use the doll Face Time screens (different ethnicities are provided), or use a blank one to design your own. Place a piece of lamination sheet over each (or clear tape works), glue onto a layer of board, cut out, then glue to one more layer of board so it becomes about 1/8” thick. Paint around the edges and back to create the case (I found pastel nail polish worked great). Add 2 tiny black dots of paint to the back for the camera.
How did yours turn out? Is it painted classic Barbie pink? Did you know there is a pink paint shortage because of all the pink paint used on set of the new Barbie movie? Let me know with a comment…I love comments more than Ken loves Barbie. Well, maybe not that much, but pretty close!