Since the huge popularity of K-Pop Demon Hunters was so unexpected, there won’t be any dolls until next year. Have you seen the images of the Barbies from Mattel Creations that are now sold out for preorder? Wow are they gorgeous! So for now, it’s just DIY if you want the characters (like many did for Halloween costumes).
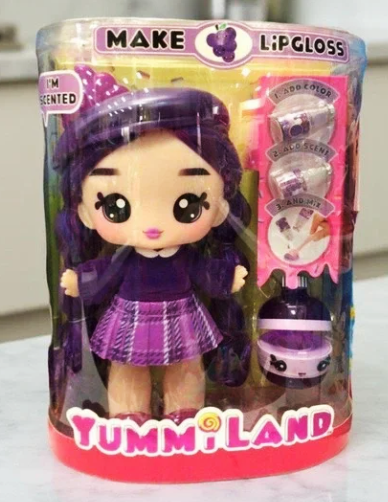
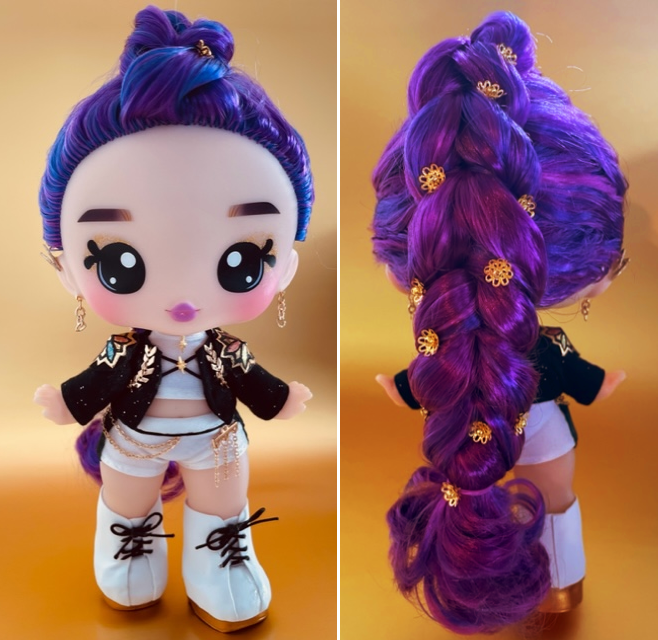
My daughter received a very cute purple-haired doll for her K-Pop birthday party, I assume because Rumi has purple hair. It’s Greta Grape, a Yummiland doll that comes with a make-your-own lipgloss kit. I decided to surprise her by giving it a Golden Rumi makeover!
In you haven’t seen my About Me page, I was a Designer at a doll company. While I’m always designing and crafting, I haven’t designed a doll in a very long time, but man do I love to do it! In fact, I think it’s my favorite craft of all.
If you’d like to DIY too, I have provided my free pattern here, and the steps of how I did it. Please note I did not mark the seam allowance, so please use 3/16”.
You don’t need a sewing machine because it’s all sewn by hand. I would probably end up sewing my finger because it’s so tiny.
I learned a lot doing this project. I thought I would use 1/8” ribbon trim but it’s actually too big! I ended up using the 1.5mm cord I had leftover from the set I ordered for making the knot bracelets for the party (that post here).
Materials
– 10” Yummiland Greta Grape Doll (with shoes)
– Rubber Bands (clear or purple for hair)
– White Spandex
– Metallic Gold Fabric (non-fraying)
– 1.5mm Black Satin Cord
– 5/8” Black Ribbon
– Gold-tone Jewelry Pieces/Chains/Jump Rings/Seed Beads/Bead Caps or Sequins (as needed)
– 2 Gold-tone Head Pins
– Black Fabric (thin, stretchy…I used my daughter’s worn out leggings)
– Black Felt
– White Foam Sheet
– Acrylic Paint: Metallic Gold & Black
– Clear PVC (small piece, can be found on packaging)
– Nail Polish: Clear with gold glitter + gold metallic
– Thread (white, black, golden yellow)
– Metallic Gold Card Stock
Supplies
– Hot Glue Gun/Sticks
– Aleene’s Jewel-It Embellishing Glue
– Aleene’s Tacky Glue
– Scissors (fabric and paper)
– Printer/Paper (for pattern)
– Paintbrush
– Sewing Needle, Pins
– Awl (poking tool found in leather crafts)
– 2 Jewelry Pliers
– Lighter
– Fine Tip Permanent Marker
– Permanent Markers (I used blue, green, red, pink & purple)
– Toothpick
– Xacto Knife + Cutting Mat
Shorts
After printing & cutting out the paper patterns, cut the shorts pattern twice out of the white spandex for the front & back. Sew the sides together and sew the bottom edges in with white thread. Place a piece of the 5/8” black ribbon over each side seam and sew with black thread, turning it under the bottom of the edge. Cut out the waistband and sew to the top of the shorts with white thread. Fold it over and sew again. Sew on a piece of black cord over the waistband seam.

I decided there wasn’t enough room for the belt, but you can certainly add one if you like!
Take a 2 1/8” tiny chain and a 2 5/8” chain (or a 4 3/4” piece turned at 2 1/8”) and sew them at the ends with white thread to the shorts letting them drape down. I found my chains on a pair of earrings that was on clearance at Walmart.
For the norigae (we just learned a new word!) use the jewelry pliers to hang chains to a beading multi-strand endpiece and sew it on the front of the shorts.
Boots
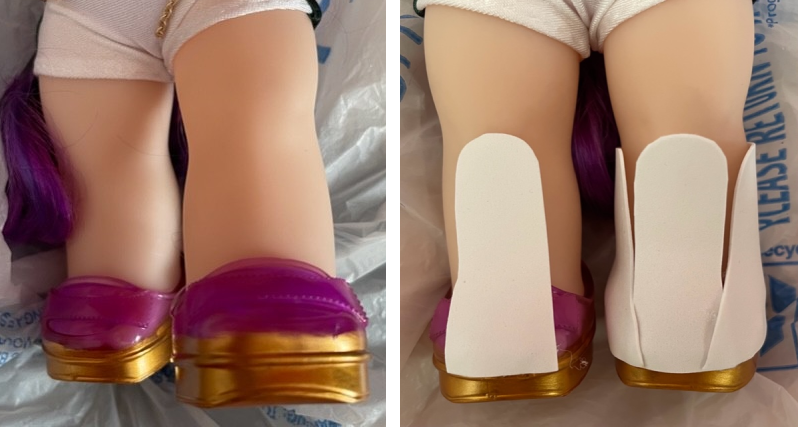
Paint the bottom edges and soles of the doll shoes gold and allow to dry (it may take 2 coats).
Cut out 4 Side Boot pieces and 2 Boot Tongue pieces out of the white foam sheet. Hot glue the tongues to the shoes at the front on the bottom only.
Use the awl to mark the laces holes on the Side Boot foam pieces.
Cut out the 4 PVC pieces and hot glue them around the edges to the Side Boot pieces (make sure you have 2 opposite pairs). The purpose of the PVC is to keep the laces from ripping the foam.
Carefully use the awl to poke the laces holes through the PVC spots.
Hot glue the Side Boot pieces (align where the heel goes up on the side) with the PVC hidden to the inside, overlapping the tongue and on the back leg.
Shoelaces: Cut (2) 10” pieces of black cord and carefully seal the ends with a lighter. Lace through the holes, then tie in bows. Did you know the laces are black when Rumi performs Golden, then they are gold at the end of the movie?
Halter Top
I decided to sew the halter top directly onto the doll because it’s very small and it would be too difficult to pull over the arms. I also chose to skip the collar opening since it’s also so small and gets covered up by the embellishment anyway.
Cut out the Front piece and the 2 Back pieces out of the white spandex (be sure to flip the back pattern over when cutting the second piece so that you get the right side of the fabric).
Placing the right side to the right side, sew the 3 pieces together at the collar and sides. Turn under the armhole, bottom, & collar edges and topstitch.
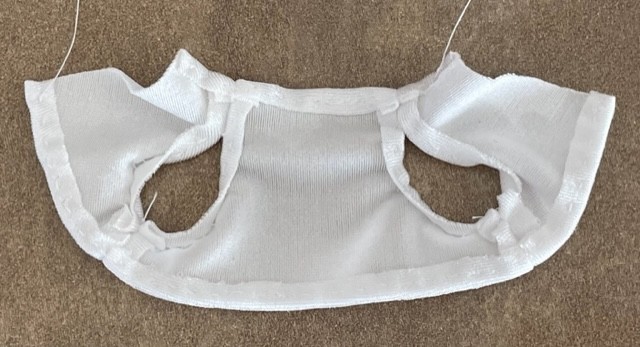
Put onto the doll and sew it closed down the center back.
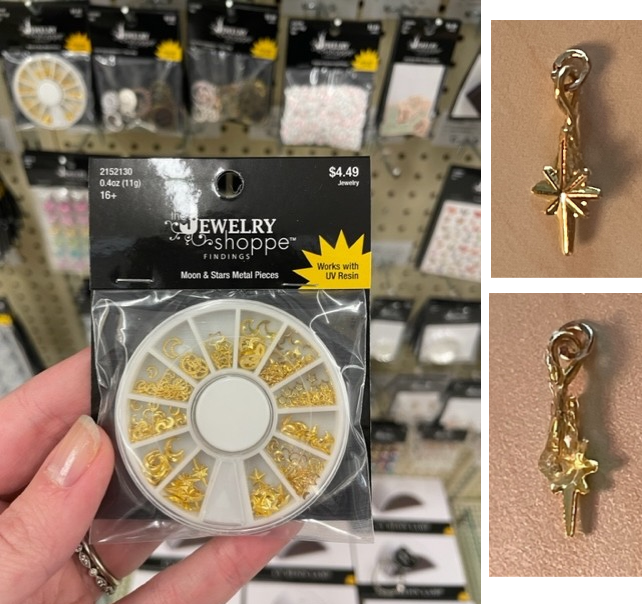
Sew a tiny jump ring to the top of the collar and hang a gold diamond/star shape from it. Mine wasn’t a bead so I turned it into one by hot gluing a gold post with a loop to the back side.
Jacket
Because the trims can’t stretch like the fabric,the jacket won’t be removable. If you’d like it to be removable, cut 2 pieces for the back, adding seam allowance with Velcro, and only put the trims on the front.
Cut the Back Jacket piece and the 2 Front Jacket pieces out of the black fabric (make sure to flip over the front pattern when cutting the second time so that the right side of the fabric shows).
Sew the Back to the Front pieces at the shoulders and sides with black thread. Turn under the top and bottom edges and stitch them to finish the edges.
Cut out the 2 sleeves and sew them to the armholes. Turn under the cuff and sew to finish the edges.
I planned on adding gold trim to the jacket edges and more chains around the shoulders but I decided there wasn’t enough room for it to look right. But you can certainly add it!
Shoulder Flowers: This is probably the most difficult part. Trace the shoulder flower pattern onto the gold fabric twice (I used parts of an old Halloween unicorn costume from Target) but don’t cut it out yet! Using a toothpick with the black paint, paint the small center circle, then the petals, then the lines between the petals. Once dry, color the petals with different colored permanent markers (if you don’t have that, maybe try nail polish). The colors may soak through the fabric, so color on top of a piece of paper.
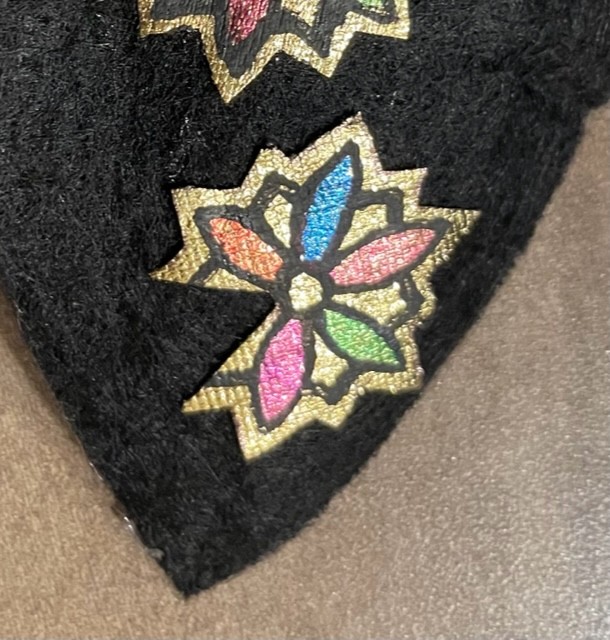
Now cut them out and glue onto some black felt with a thick layer of the embellishing glue. Once dry, cut the felt to the pointed tips in a circle shape, then cut a line along one triangular opening. Hot glue to the jacket at the shoulders, closing the opening.
I decided not to make the big gold shoulder piece Rumi wears for the performance because I like the shoulder flowers so much, but you can make it by cutting out a couple layers of the foam, gluing tiny lace on top, then painting it gold.
Put the jacket on the doll and sew on the gold trim with gold thread. I was fortunate to find a gold necklace for this on clearance at Walmart!

Straps: I found it easiest to hot glue this. Cut 2 small pieces of black cord and place them in an X shape on top of the shirt. Carefully add hot glue on the cord ends then press the jacket on top. Add a tiny gold star embellishment in the middle. Mine wasn’t a sequin or bead so I sewed it from the inside of the shirt, going once over the top point and once over the lower point with a single gold thread.
Eyes
Add a little gold glitter nail polish for eyeshadow.
Hair
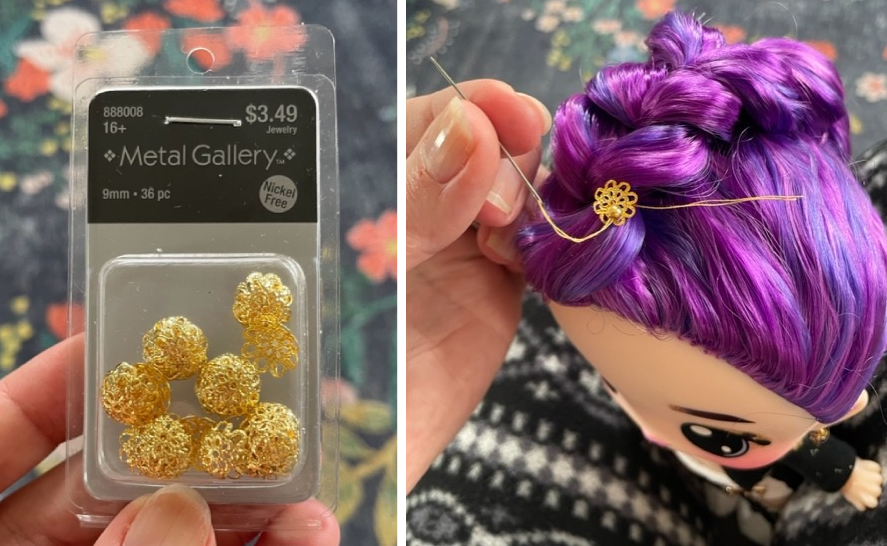
I removed all the rubber bands and used them to make Rumi’s dragon braid, using this YouTube tutorial. There are quite a few braid tutorials but I like this one because it has the top of the braid (instead of flat). After completing the braid, sew on gold flower sequins (with seed beads) or bead caps to decorate…I used 16 bead caps with gold Pearl beads.
Earrings
Use the awl to pierce the doll’s ears. Take a head pin and twist a small loop right under the head of the pin. Attach a chain to the loop then insert into the ear (repeat for the other earring). I did 2 large links with 1 small at the end for each earring.
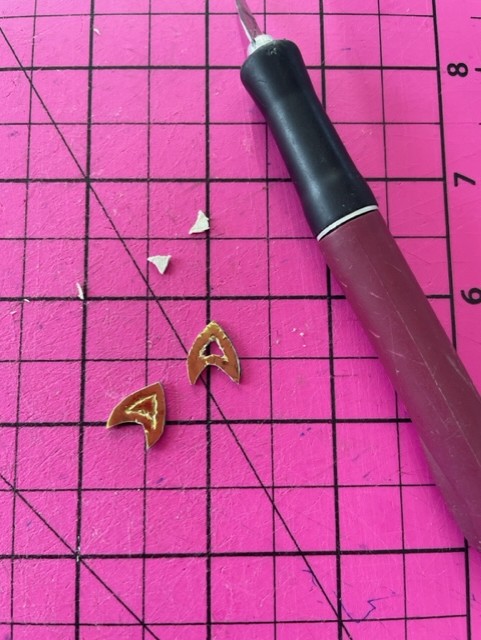
For the upper earring, cut the pattern out of gold card stock 4 times and glue back-to-back with Tacky Glue so you have 2 pieces. Using the Xacto knife with a cutting mat, carefully cut a tiny triangle out of the middles. With a toothpick, paint the white paper edges with metallic gold nail polish. Hot glue both pieces on top of the doll’s ear.
In case you know my daughter, don’t tell her about this…it’s a Christmas present surprise! Will you be surprising anyone with a special K-Pop gift of your own?